Blog

  • V60 vs Chemex vs French press: which to choose for your coffee

    V60 vs Chemex vs French press: which to choose for your coffee

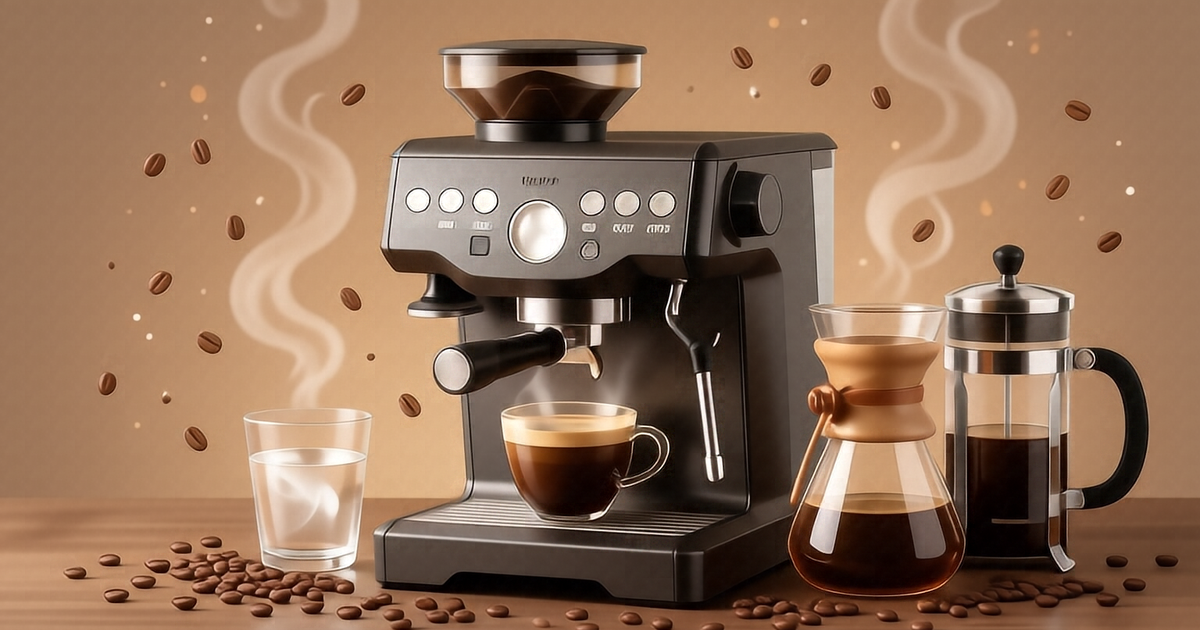
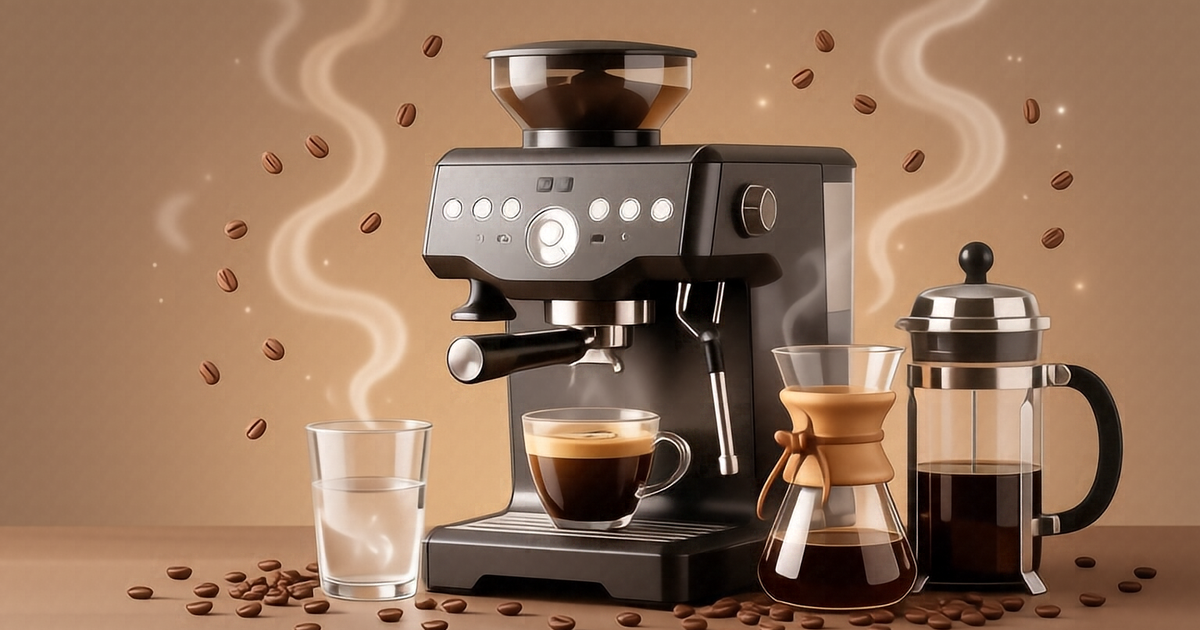
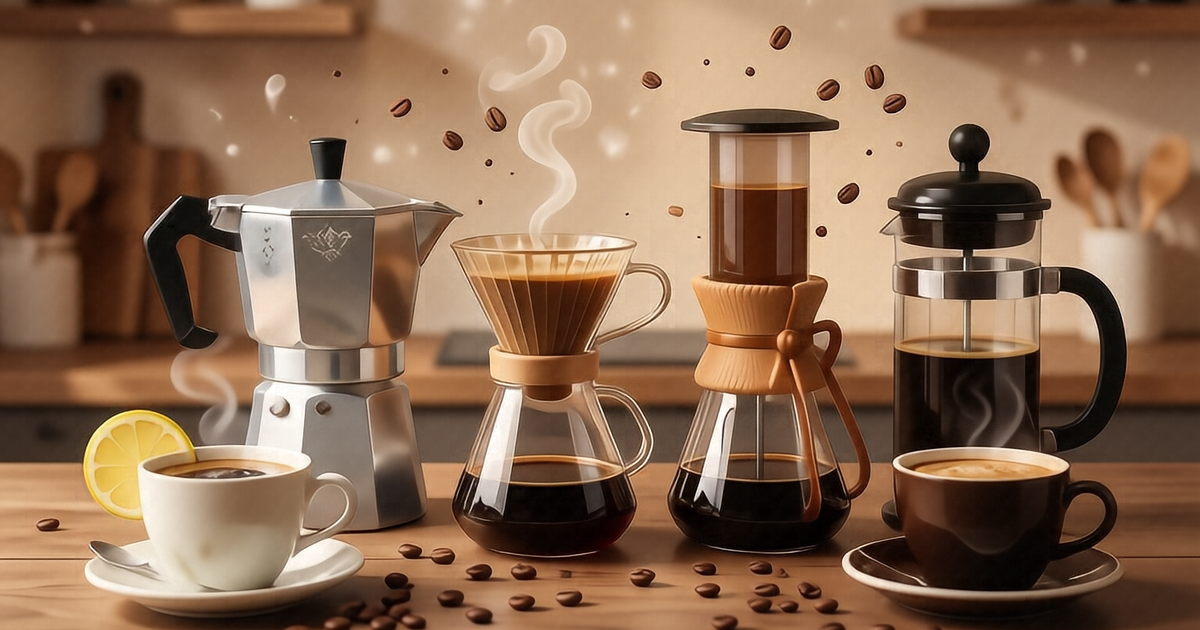
    Three methods, three completely different coffees. The V60, the Chemex and the French press are the three most popular ways to brew filter coffee at home, and none is “better” than the others: each produces a different flavor profile and demands a different level of attention. This comparison tells you which one fits your routine.

    V60: precision and clarity

    The V60 is a cone made of ceramic, glass or plastic with a single large opening and spiral ridges. Water passes through quickly and the coffee extracts very efficiently.

    • Flavor: a clean, bright cup with lots of aromatic clarity. The coffee’s nuances show up like in no other method.
    • Difficulty: medium-high. The V60 demands technique: controlled pouring, consistent grind and attention to time. It’s the favorite method of baristas in competition.
    • Gear: you need a gooseneck kettle to control the pour and a scale if you want consistency.
    • Cleanup: easy — toss the filter and rinse the cone.

    Who it’s for: if you love specialty coffee and enjoy the ritual of brewing it well, the V60 is the method that most rewards attention.

    Chemex: elegance and a clean cup

    The Chemex is a glass carafe shaped like an hourglass with a special thick filter. The filter retains more oils and particles than the V60.

    • Flavor: a very clean, light cup with low body and lots of sweetness. It’s the most “filtered” coffee of the three: almost no sediment or oils.
    • Difficulty: medium. The pour is more forgiving than the V60, and the thick filter forgives grind errors.
    • Gear: the carafe also serves; you only need the filter and, ideally, a gooseneck kettle.
    • Batch size: the ideal method for 2-4 cups at once, something the V60 does worse.
    • Cleanup: easy, though the glass carafe needs a bit of care.

    Who it’s for: if you want several quality cups with elegance and no fuss, or if you prefer a light, sweet coffee.

    French press: body and simplicity

    The French press is a glass cylinder with a metal mesh plunger. The coffee steeps in contact with the water and is separated by pressing the mesh. There’s no paper filter: the oils and fine particles stay in the cup.

    • Flavor: a full-bodied, dense cup with the coffee’s oils present. More intense and “earthy” than the other two.
    • Difficulty: low. You measure coffee, add water, wait 4 minutes and press. There’s no pouring technique to master.
    • Gear: just the carafe. No paper filters or special kettles. The grind must be coarse (like breadcrumbs).
    • Cleanup: the most tedious — you have to empty the grounds and wash the mesh.

    Who it’s for: if you want a full-bodied coffee without fuss, or if your budget doesn’t include a scale or special kettle. It’s the best method to start with.

    Quick comparison

    • Body: French press (maximum) > V60 > Chemex (minimum).
    • Flavor clarity: Chemex and V60 much cleaner than French press.
    • Difficulty: French press (minimum) > Chemex > V60 (maximum).
    • Batch size: Chemex (best for groups) > French press > V60 (best for one cup).
    • Cleanup: V60 (easiest) > Chemex > French press (most tedious).
    • Entry price: French press (cheapest) > V60 > Chemex.

    FAQ

    Which method gives the smoothest coffee?

    The Chemex: the thick filter removes almost all oils and particles. It’s the cleanest, lightest coffee of the three.

    Which method is best for a beginner?

    The French press: no pouring technique, no filters, no scale. Good coffee with minimal gear.

    Can I use the same grind for all three?

    No. The V60 and Chemex need a medium-fine grind; the French press, a coarse one. An adjustable burr grinder handles all three.

    How much coffee and water do I use?

    The standard ratio is 60 g of coffee per liter of water (1:16.7). For a 250 ml cup: about 15 g of coffee.

    Is the V60 only for experts?

    No, but it’s the method that punishes mistakes the most. With a consistent grind and a slow pour, anyone can get a good cup — and improves fast.

    Start where you are: if you want simplicity, French press; if you want elegant batch brewing, Chemex; if you want to squeeze the most out of specialty coffee, V60. All three can live in the same kitchen without a problem.
  • AeroPress: beginner’s guide with basic recipes

    AeroPress: beginner’s guide with basic recipes

    The AeroPress looks like a plastic toy, but it’s one of the most loved coffee brewers in the world: cheap, nearly indestructible, easy to clean and capable of making a surprisingly clean cup in two minutes. If you’re looking for a filter method with no learning curve, it’s the best gateway.

    What the AeroPress is

    The AeroPress is a plastic cylinder with a plunger and a cap that holds a paper filter. The coffee steeps in hot water and is then pushed through the filter with the plunger, using arm pressure (not machine pressure).

    Invented in 2005, it became famous for three things: it’s cheap, it’s almost impossible to break, and it allows endless experimentation. There are world championships dedicated to creating new recipes with it.

    The basic recipe (to get started)

    1. 15 g of coffee, ground medium-fine (like table sugar, a step finer than French press).
    2. Set up the AeroPress inverted (inverted method): plunger at the bottom and chamber on top, so coffee doesn’t drip through early.
    3. Add 200 ml of water at 85-90 °C (not boiling: water at 100 °C burns the coffee).
    4. Stir for 10 seconds to saturate the coffee.
    5. Steep for 1 minute.
    6. Cap with the filter, flip the AeroPress onto the cup and press for 20-30 seconds.
    7. Add hot water to top up the cup if you want it milder.

    Result: a clean cup, medium body and no bitterness. If it’s sour, grind finer; if it’s bitter, grind coarser.

    Easy variations

    • Standard AeroPress (not inverted): set the chamber on the cup and add coffee and water directly. Simpler, but you lose a little water to dripping during the steep.
    • Concentrated recipe: reduce the water to 60-80 ml and press firmly. You get a sort of “espresso” to make Americanos or add milk to.
    • With agitation: stir more (15-20 seconds) to extract more. Useful with light roasts.
    • Metal filter: instead of paper, it lets oils and particles through, giving more body. Paper gives the cleanest cup.

    Common beginner mistakes

    • Boiling water: at 100 °C the coffee turns bitter and burnt. Wait 30-60 seconds after boiling.
    • Pressing with brute force: pressure should be firm and steady, not a violent push. If you have to push hard, the grind is too fine.
    • Wrong grind: too fine and the plunger barely moves; too coarse and the coffee comes out watery.
    • Forgetting to wet the filter: rinse it with hot water before use so it doesn’t taste like paper.
    • Not experimenting: the AeroPress forgives mistakes. Try times, temperatures and ratios until you find your cup.

    Why it hooks people

    The AeroPress has unbeatable value: it costs a fraction of an espresso machine, takes up no space, cleans in seconds (push the puck out and rinse) and produces a cleaner cup than most methods. It’s also perfect for travel: it fits in a backpack with a handful of filters.

    FAQ

    Does the AeroPress make espresso?

    Not exactly: it makes concentrated coffee with arm pressure, but at much lower pressure than a machine (0.5-1 bar vs 9). The result is a clean, concentrated cup, not real espresso.

    How much coffee do I use?

    For a standard cup, 15 g of coffee and 200 ml of water. Adjust from there to your taste.

    Is the AeroPress better than the French press?

    It depends what you’re after: the AeroPress gives a cleaner cup and is easier to clean; the French press gives more body and makes larger batches.

    Can I make a latte with the AeroPress?

    Yes: brew a concentrated recipe (60-80 ml) and add hot milk. The result is a decent milk coffee without an espresso machine.

    How long does the AeroPress last?

    Years: it’s tough plastic and spare parts are cheap. The only part that wears over time is the rubber plunger seal.

    Want to compare methods before deciding? Read the V60 vs Chemex vs French press comparison, or learn the difference between filter coffee and espresso to place each method.

  • Sour or bitter coffee: how to fix it with grind and extraction

    Sour or bitter coffee: how to fix it with grind and extraction

    If your coffee tastes sour, it’s under-extracted: the water passed through too quickly and didn’t pull out the sugars and oils that balance the acidity. If it tastes bitter and burnt, it’s over-extracted: the water was in contact too long and dragged out the bitter compounds. The good news is that both problems are fixed with the same four controls: grind, dose, temperature and time. This guide teaches you to diagnose and correct each case.

    Why coffee tastes sour (under-extraction)

    Acidity is the first note extracted. If the water passes through too fast, you only pull the acids and miss the sweetness that balances them. Typical causes:

    • Grind too coarse: water rushes through the coffee without time to extract.
    • Low dose: there’s little coffee and the water passes without resistance.
    • Cold water: below 90 °C extraction slows down and comes up short.
    • Short extraction time: the coffee finishes in under 20 seconds.

    Why coffee tastes bitter (over-extraction)

    Bitterness is the last note extracted. If the water passes slowly or stays too long, it drags out the bitter compounds from the end of the extraction. Typical causes:

    • Grind too fine: water barely passes and over-extracts what it touches.
    • High dose: too much coffee for the water available.
    • Water too hot: above 96 °C it burns and bitters.
    • Long extraction time: over 35 seconds, or too long a steep with immersion methods.
    • Over-roasted or old coffee: dark roasts and stale coffee bitter more easily.

    The quick diagnosis table

    • Sour + finishes in under 20 s → grind finer.
    • Sour + lukewarm water → raise the temperature (90-96 °C).
    • Bitter + finishes in over 35 s → grind coarser.
    • Bitter + boiling water → lower the temperature.
    • Bitter + very dark roast → reduce the dose or change the roast.
    • Sour and bitter at once → uneven extraction: check the leveling of the coffee bed and the tamp.

    How to adjust one variable at a time

    The most common mistake is changing two things at once. If you grind finer and also raise the temperature, you won’t know what worked. The method:

    1. Set the base recipe: 18 g of coffee, 36 g of liquid, 25-30 seconds, 90-96 °C.
    2. Brew one cup and note the flavor and the time.
    3. Change one variable only (usually the grind, which has the most effect).
    4. Repeat until the time is right: if the time works, the flavor almost always follows.

    Adjustments by method

    Espresso: the grind is the main control. Sour → finer; bitter → coarser. If the problem persists, check temperature and dose.

    Filter coffee (V60, Chemex): besides the grind, control the pour. Sour → grind finer or pour slower; bitter → grind coarser or lower the water temperature (aim for 92-94 °C).

    French press and AeroPress: here the steep time is the main control. Sour → lengthen the steep; bitter → shorten it. With the AeroPress, a fine grind with a slow press also helps.

    When the problem isn’t extraction

    • Old coffee: coffee loses sweetness and gains bitterness over the weeks. Check the roast date, not the best-before date.
    • Hard or chlorinated water: bad water flattens flavor. Try filtered water.
    • Dirty machine: stale oils in the group and portafilter bitter any coffee. Clean the group regularly.
    • Very dark roast: if the roast is the problem, no grind adjustment fully fixes it. Try a medium roast.

    FAQ

    Why is my espresso sour even when I grind finer?

    The temperature may be low, or the dose too small. Also check that the portafilter is properly filled and level: an uneven bed gives uneven extraction.

    Does bitter coffee mean more caffeine?

    No. Bitterness comes from over-extraction, not caffeine. An over-extracted coffee can even have less caffeine than a well-extracted one.

    What water temperature do I use for each method?

    Espresso, 90-96 °C. Filter, 92-96 °C (lower for dark roasts). Immersion, 85-95 °C depending on the method. No thermometer? Wait 30-60 seconds after boiling.

    How long should an espresso take?

    25-30 seconds from the first drop, for 36 g of liquid with 18 g of coffee. Less time, sour; more, bitter.

    Can I fix sour coffee with milk or sugar?

    You can mask it, but not fix it: the problem is in the extraction and it will repeat in every cup. Adjust the grind and you’ll get good coffee without needing to cover it.

    Sour and bitter coffee aren’t flaws of the brand: they’re messages from your extraction. Learn to read them, change one variable at a time, and within a few cups you’ll be pulling balanced coffee — sweet, not burnt. The timer and the grinder are your best allies.

  • How to descale your coffee maker using manufacturer guidance

    How to descale your coffee maker using manufacturer guidance

    Identify your machine first

    Read the manual for the exact model before choosing a product. Not every coffee maker allows vinegar: seals, internal materials and warranty conditions matter. If the manufacturer specifies a descaler, use a compatible product at its stated dose. Do not borrow a recipe from a different machine.

    Cleaning and descaling are different

    Cleaning removes coffee residue and oils from the carafe, filter and accessible parts. Descaling targets mineral deposits in the water circuit. An acidic descaler does not replace cleaning coffee oils. Wash removable parts only as instructed and never immerse the electrical body.

    Descaling procedure

    1. Let the machine cool and remove coffee, capsules and used filters. Check whether the water filter must come out.
    2. Prepare the approved product at the concentration and volume specified in the manual. There is no universal vinegar ratio: use it only when the manufacturer explicitly permits it.
    3. Place a sufficiently large container under the outlet and run the specified program. Do not improvise long soaking pauses or send mixtures through the steam wand unless instructed.
    4. Keep children and pets away from hot liquid. Do not brew coffee during maintenance.
    5. Empty and rinse for the number of cycles required by the manufacturer. If an odor remains, consult the manual and repeat only permitted fresh-water rinses.
    6. Reassemble the machine and reset its maintenance notification according to the model instructions.

    What to avoid

    Do not put baking soda in the reservoir to neutralize vinegar. Never mix acids, bleach, detergents or other cleaners. Do not use homemade citric-acid doses without checking compatibility. Unplug the machine and let it cool before wiping the exterior.

    How often to descale

    The interval depends on water hardness, use, the filter and the model. Follow the machine reminder or manual; filtering water does not always remove hardness. Slow flow or unusual flavor can have other causes, so do not keep repeating descaling if the problem persists.

    Frequently asked questions

    Does vinegar damage every machine?

    There is no universal answer. Some manufacturers allow it and others advise against it. Check the exact model manual before use.

    Can espresso and drip machines use the same procedure?

    Not automatically. The group, valves and steam system may need different procedures. Backflushing is also different from descaling.

    How many rinse cycles are needed?

    Use the number specified for your product and program. Do not assume two cycles are enough for every machine.

    Where to check instructions

    Find the model code on the machine label and download its manual from the manufacturer’s official website. The correct maintenance recipe is the one for that model, not a generic internet dilution.

  • How to make espresso at home: extraction, grind and temperature

    How to make espresso at home: extraction, grind and temperature

    A perfect espresso isn’t luck: it’s an equation of four variables — grind, dose, pressure and time — that you can learn to control. If your coffee tastes sour or bitter, the machine isn’t the problem: one of those variables is off. Here’s the method to find the sweet spot.

    The four pillars of espresso

    • Grind: coffee should be ground right before extraction. A fine grind (like sugar) slows the water and extracts more; a coarse one lets water through fast and extracts less. A burr grinder is essential: blade grinders can’t produce consistency.
    • Dose: the amount of coffee in the portafilter. The standard is 18 grams for a double, but what matters is the ratio with the liquid that comes out.
    • Pressure: 9 stable bars at the pump. You don’t need more; you need it to not fluctuate.
    • Temperature: between 90 and 96 °C in the water that touches the coffee. Too cold, the espresso turns sour; too hot, bitter and burnt.

    The base recipe

    Start with this base and adjust from there:

    1. 18 g of coffee, ground fine, in the portafilter.
    2. Level and tamp: the coffee bed must be flat and even. One firm tap with the tamper and done — no brute force needed.
    3. Extract 36 g of liquid (1:2 ratio) in 25-30 seconds from the first drop.

    If the time is right, the flavor usually follows. If not, adjust the grind — not the dose or the pressure.

    How to read your extraction

    • Under 20 seconds, watery and sour coffee: grind too coarse. The water passed through quickly and extracted too little. Grind finer.
    • Over 35 seconds, bitter and burnt coffee: grind too fine or dose too high. The water was in contact too long. Grind coarser.
    • Channeling from one side of the portafilter: the coffee bed isn’t level or the tamper was crooked. Distribute better before tamping.
    • Pale, bubbly crema: old or over-roasted coffee. Try fresh coffee.

    The most common mistakes

    • Pre-ground coffee: it loses aroma within days. Buy beans and grind at the moment.
    • Changing two variables at once: adjust one thing per cup; if you change grind and dose together, you won’t know what worked.
    • Tamping with brute force: tamp pressure matters less than leveling. One firm, even tap is enough.
    • Ignoring the timer: the clock is your best tool. Without a reference time, you’re guessing.
    • Rushing the warm-up: the machine needs 15-20 minutes to stabilize temperature, not 2.

    When to adjust the recipe

    • More acidic or lightly roasted coffee: try extracting a bit longer (1:2.5 ratio) to soften the acidity.
    • Dark roast coffee: extract a little less (1:1.8) to avoid bitterness.
    • Humid days or very fresh coffee: the grind can behave differently. Adjust fine or coarse based on extraction time.

    FAQ

    Do I need an expensive machine to make good espresso at home?

    No. With a basic semi-automatic, a good burr grinder and fresh coffee you get a respectable espresso. Technique matters more than the machine.

    How much coffee for an espresso?

    For a double, 18 g of coffee and 36 g of liquid. For a single, half — though most modern portafilters are designed for doubles.

    Why is my espresso sour?

    Because it’s under-extracted: coarse grind, low dose or cold water. Grind finer and make sure the machine is hot.

    Why is it bitter?

    Over-extraction: grind too fine, too much time or water too hot. Grind coarser and reduce the time.

    Does espresso have more caffeine than filter coffee?

    By volume, yes; by cup served, no. A single espresso (30 ml) has less caffeine than a cup of filter coffee (200 ml).

    Want to go further? Learn the difference between filter coffee and espresso to choose your method well, or discover how to pick the best espresso machine to get started.